Evaluating the "Back to Virtual School" Design for Real Projects
A Designer's First Impression: Theme and Mood
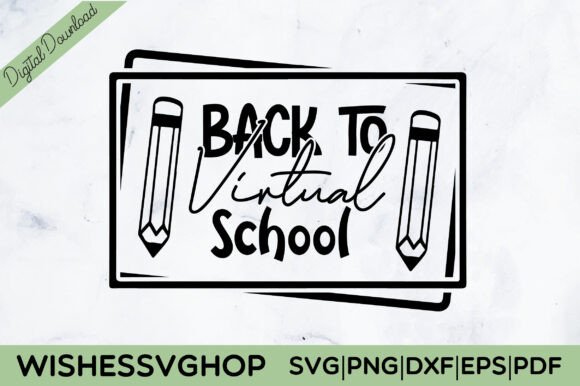
When I first unzipped the "Back to Virtual School" file, the theme immediately registered as clever and timely. It taps into that specific, shared modern experience—a blend of nostalgia for traditional school motifs and our current digital reality. The visual personality feels lighthearted and relatable, not overly sentimental or harsh. For embroidery, this is a great starting point. A design with a clear, engaging mood translates into a product that tells a story, which is exactly what customers look for in personalized gifts and custom apparel.
The Natural Habitat for This Embroidery Design
In my mind, this design belongs on items that celebrate a milestone or mark a moment. I pictured it stitched onto a cozy, fleece-back sweatshirt for a student navigating online classes—a wearable badge of their unique school year. It would shine equally well on a tote bag used for carrying laptops and books, becoming a functional, daily affirmation. For baby clothes or nursery decor, it leans more toward a gift from a parent or grandparent, a cute, future-looking keepsake. Its theme makes it a strong candidate for holiday gifts, like a "back-to-school" season pillow cover or a personalized kitchen towel for a teacher.
Where This Design Adds Value for Your Craft Business
As a small business owner selling handmade products, your goal is to create items that feel special and well-executed. The "Back to Virtual School" design, when embroidered cleanly, boosts that perceived value. Its recognizability creates instant buyer engagement. A customer sees it on an Etsy listing or at a craft fair and immediately understands the story. That connection builds trust—they feel you’re offering something thoughtful, not just generic. For brand consistency, if your shop focuses on modern, witty, or family-oriented themes, this embroidery file fits seamlessly into that catalog.
Practical Performance on Real Fabrics and Products
Moving from the idea to the hoop, let’s think about real-life embroidery situations. On custom apparel like t-shirts, the success of this machine embroidery design will hinge on fabric choice and stabilizer. A sturdy cotton tee or a stable sweatshirt fabric will handle the stitches well. For a tote bag made from canvas or denim, it should perform beautifully, resulting in a crisp, durable finished product.
However, we must consider areas for careful use. If the design includes tiny lettering or very dense stitch areas—common in some graphic-style files—you’ll need to be cautious on small hoop sizes or textured fabrics like some blankets. Stretchy fabric, like on certain baby clothes, requires extra stabilization to prevent distortion. Embroidering on dark fabric demands thoughtful thread color contrast for the design to pop visually. Curved surfaces, like caps, can be tricky if the design has wide, filled elements that might pucker on the curve.
Scenarios That Demand Extra Attention
- Small Details: Always inspect the small details in your software preview. Tiny elements might need simplification or a different stitch type, like a running stitch instead of a satin stitch, to remain clear.
- Frequent Wash Items: For products like aprons or kitchen towels that need frequent washing, a robust stitch density and quality threads are key to longevity.
- Layered Garments: Embroidering on a shirt pocket or a layered collar area requires precise placement to avoid an awkward overlap.
How It Affects Your Professional Outcomes
From a professional embroidery designer’s standpoint, the clarity of the final stitching is paramount. A clean, well-defined "Back to Virtual School" embroidered patch, for instance, looks professional and increases giftability. It feels like a finished, intentional product, not a hobby experiment. For commercial embroidery projects or for Etsy sellers creating digital product previews, a design that stitches out reliably is a core asset. It saves time, reduces test runs, and builds confidence that your finished product will meet customer expectations every time.
Essential Designer Notes Before You Hoop Up
Before committing this design to a client’s project or your boutique merchandise, follow these practical steps. They are the difference between a good result and a great one.
- Test on Scrap Fabric First: Use the same fabric and stabilizer you plan for the final project. This reveals the true stitch density, how the thread colors interact with the background, and whether any details get lost.
- Check Light and Dark Backgrounds: Create simple black and white mockups or test stitches on both light and dark scraps. This informs your thread palette decisions.
- Confirm Hoop Size Compatibility: Ensure your intended hoop size can accommodate the design's dimensions without forcing unnecessary compression of elements.
- Review Licensing for Your Use: Since the product description notes it’s a digital graphics file, always confirm the licensing terms before selling finished items or using it in commercial projects. Know your rights as a maker.
- Consider the Fabric Texture: A highly textured fabric like some blanket weaves might obscure finer details. A smooth fabric will showcase them best.
The Final Verdict for Makers and Entrepreneurs
The "Back to Virtual School" design holds solid potential for a range of embroidery projects. Its theme is its strongest asset, creating natural appeal for personalized gifts and small shop products. Its practical success, however, rests entirely on your execution. By treating it as a professional design asset—testing, adapting to your specific fabric, and respecting its technical boundaries—you can transform this digital embroidery file into a beautiful, valuable handmade product. It’s a design that, when stitched with care, can genuinely resonate with customers and enhance your craft business’s offerings.